Aug 18, 2022
About Adobe Bridge – Animating Text
Adobe Bridge is a powerful, flexible tool for organizing, browsing, and locating the assets you need to create content for print, web, television, DVD, film, and mobile devices. Adobe Bridge keeps native Adobe files (such as PSD and PDF files) as well as non-Adobe files available for easy access. You can drag assets into your layouts, projects, and compositions as needed; preview your assets; and even add metadata (file information) to assets to make files easier to locate.
In this lesson, you’re opening Adobe Bridge from within After Effects, but you can also open Adobe Bridge directly. To do so, choose Adobe Bridge from the Start menu (Windows) or double-click the Adobe Bridge icon in the Applications/ Adobe Bridge folder (macOS).
The Content panel in Adobe Bridge updates interactively. For example, when you select the Assets folder in the Folders panel, thumbnail previews of the folder’s contents appear in the Content panel. Adobe Bridge displays previews of image files such as those in PSD, TIFF, and JPEG formats, as well as Illustrator vector files, multipage Adobe PDF files, QuickTime movie files, and more.
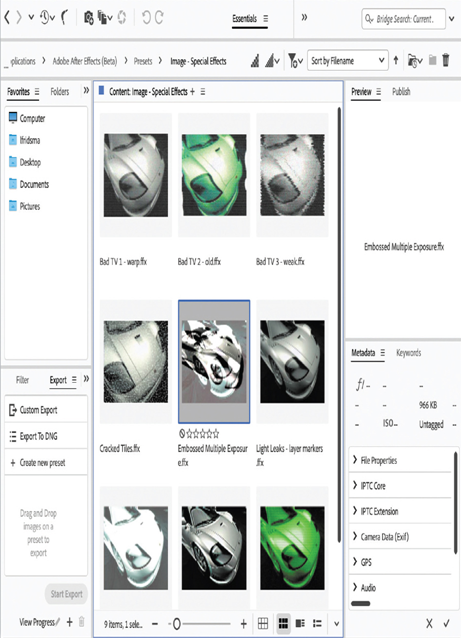
You may need to install Adobe Bridge separately from Creative Cloud. If Bridge is not installed, you’ll be prompted to install it when you choose Animation > Browse Presets.
Customizing an animation preset
After you apply an animation preset to a layer, all of its properties and keyframes are listed in the Timeline panel. You’ll use those properties to customize the preset.
- Press the spacebar to watch a preview of the animation. The letters flip into place, and then the entire title scales down to 200%. Press the spacebar again to stop the preview.

The letters appear to ripple into the background. It looks great—but you’ll customize the preset to change the order in which the letters appear.
2. Select the Snorkel Tours text layer in the Timeline panel, and then expand the layer’s properties. Navigate to the Text > Animator – Ripple 1 (Skew) > Selector Offset > Advanced properties.
3. Click Off next to Randomize Order to toggle it to On.
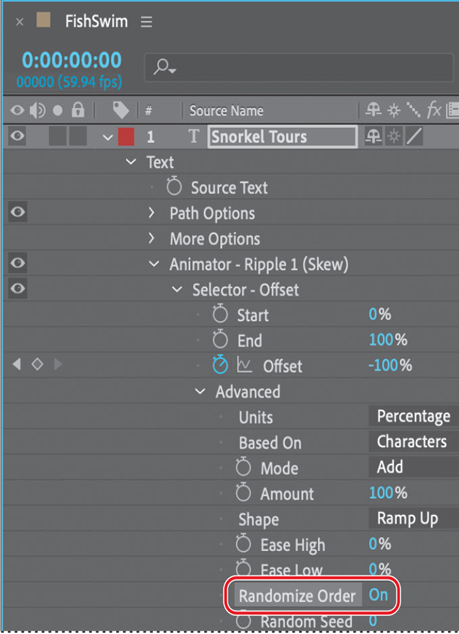
The Randomize Order property changes the order in which letters appear on the screen as they ripple into place.
4. Drag the current-time indicator from 0:00 to 3:00 to manually preview the animation you edited.

5. Hide the layer’s properties.
6. Press the End key to move the current-time indicator to the end of the time ruler, and then press N to set the end bracket of the work area.
7. Press the Home key or go to 0:00 to return the current-time indicator to the beginning of the time ruler.
8. Choose File > Save to save your project.
More DetailsJun 1, 2022
Adding Easy Ease – Animating Text
The beginning and end of the scale animation are rather abrupt. In nature, nothing comes to an absolute stop. Instead, objects ease into and out of starting and stopping points. You’ll apply Easy Ease to make the animation smoother.
- In the Timeline panel, right-click (Windows) or Control-click (macOS) the Scale keyframe at 3:00, and choose Keyframe Assistant > Easy Ease Out. The keyframe becomes a left-pointing icon.
- Right-click (Windows) or Control-click (macOS) the Scale keyframe at 5:00, and choose Keyframe Assistant > Easy Ease In. The keyframe becomes a right-pointing icon.
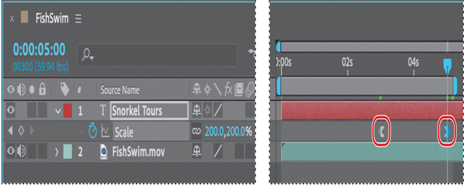
3. Watch another preview. Press the spacebar to stop it when you’re done.
4. Hide the Scale property in the Timeline panel, and then choose File > Save.
Using a text animation preset
Currently, the title appears when the video begins. You’ll animate the title to make its arrival more interesting. The easiest way to do that is to use one of the many animation presets that come with After Effects. After applying an animation preset, you can customize it and save it to use again in other projects.
- Press the Home key or go to 0:00 to make sure the current-time indicator is at the beginning of the time ruler.
After Effects applies animation presets from the current time.
2. Select the Snorkel Tours text layer.
Browsing animation presets
You already applied an animation preset using the Effects & Presets panel in Lesson 2, “Creating a Basic Animation Using Effects and Presets.” But what if you’re not sure which animation preset you want to use? To help you choose the right animation preset for your projects, you can preview presets in Adobe Bridge.
Note
If Bridge isn’t installed, you’ll be prompted to install it when you choose Browse Presets. For more information, see page 2.
- Choose Animation > Browse Presets. Adobe Bridge opens, displaying the contents of the After Effects Presets folder. Click Yes if prompted to enable the After Effects extension in Bridge.
- In the Content panel, double-click the Text folder, and then the Organic folder.
- Click to select the first preset, Autumn. Adobe Bridge plays a sample of the animation in the Preview panel.
- Select a few other presets, and watch them in the Preview panel.
- Preview the Ripple preset, and then right-click (Windows) or Control-click (macOS) the thumbnail, and choose Place In Adobe After Effects.
Note
If a generic ffx image appears instead of the preview, reset Bridge preferences: Press Ctrl+Alt+Shift (Windows) or Command+Option+Shift (macOS) while you restart Bridge.
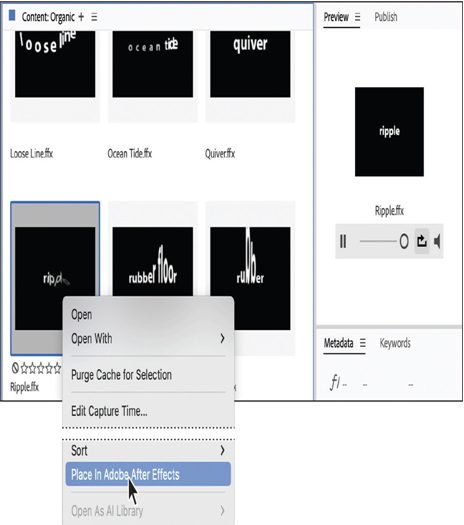
6. Return to After Effects, but leave Adobe Bridge open in the background.
After Effects applies the preset to the selected layer, which is the Snorkel Tours layer, but the layer no longer appears in the composition. This is because at 0:00, the first frame of the animation, the letters haven’t yet rippled into the scene.
More DetailsMay 2, 2022
Positioning the type – Animating Text
To precisely position layers, such as the text layer you’re working on now, you can display rulers, guides, and grids in the Composition panel. These visual reference tools don’t appear in the final rendered movie.
- Make sure the Snorkel Tours text layer is selected in the Timeline panel.
- Choose Layer > Transform > Fit To Comp Width. This scales the layer to fit to the width of the composition.
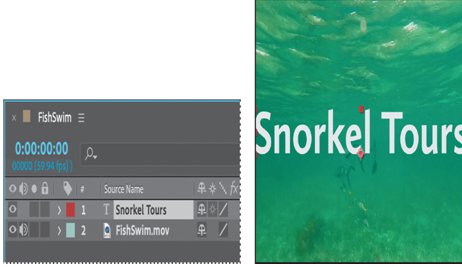
Now you can position the text layer using a grid.
3. Choose View > Show Grid and then View > Snap To Grid.
4. Using the Selection tool (), drag the text up in the Composition panel until the text is in the top quarter of the composition, centered in the surface of the water. Press Shift after you start dragging to constrain the movement and help you position the text.
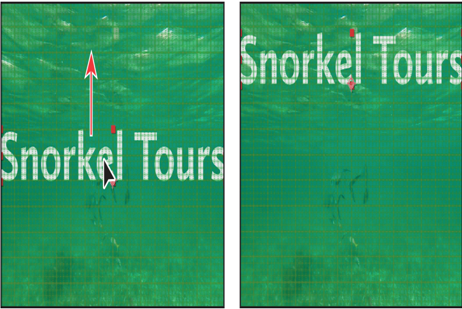
5. When the layer is in position, choose View > Show Grid again to hide the grid.
This project isn’t destined for broadcast TV, so it’s okay that the title extends beyond the title-safe and action-safe areas of the composition at the beginning of the animation.
6. Choose File > Save to save your project.
Animating with scale keyframes
The text layer was scaled to nearly 250% when you applied the Fit To Comp Width command to it earlier in this lesson. Now, you’ll animate the layer’s scale so that the type gradually shrinks down to 200%.
- In the Timeline panel, move the current-time indicator to 3:00.
- Select the Snorkel Tours text layer.
- In the Properties panel, click the stopwatch icon (
) next to the Scale property to add a keyframe at the current time (3:00).
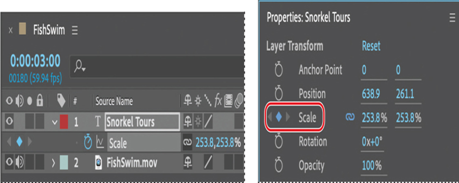
4. Move the current-time indicator to 5:00.
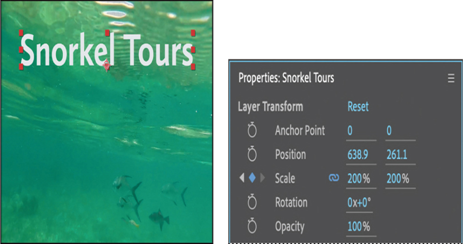
5. Reduce the layer’s Scale values to 200, 200%. After Effects adds a new Scale keyframe at the current time.
Previewing a range of frames
Now, you’ll preview the animation. Although the composition is 13 seconds long, you need to preview only the first five seconds, since that is where the text animation occurs.
- Move the current-time indicator to 5:10, and press N to set the end of the work area. The scale animation ends shortly before 5:10.
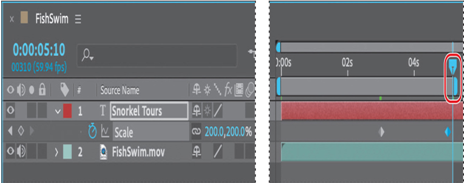
2. Press the spacebar to preview the animation from 0:00 to 5:10. The movie title scales to a smaller size.

3. Press the spacebar to stop playback after you’ve viewed the animation.
More DetailsMar 24, 2022
Creating and formatting point text – Animating Text
When you enter point text in After Effects, each line of text is independent—the length of a line increases or decreases as you edit the text, but it doesn’t wrap to the next line. The text you enter appears in a new text layer. The small line through the I-beam marks the position of the text baseline.
- In the Tools panel, select the Horizontal Type tool (
).

Note
If you press Enter or Return on the regular keyboard instead of on the numeric keypad, you’ll begin a new paragraph.
2. Click anywhere in the Composition panel, and type Snorkel Tours. Then exit text-editing mode by pressing Enter on the numeric keypad or selecting the layer name in the Timeline panel. The text layer is selected in the Composition panel.
Formatting character attributes
You can edit character attributes in the Character panel or the Properties panel. If text is highlighted, changes you make affect only the highlighted text. If no text is highlighted, changes you make affect the selected text layers and the text layers’ selected Source Text keyframes, if any exist. To create defaults for the next text entry, make changes in the Character panel when no text is highlighted and no text layers are selected. By default, the Properties panel displays character options when you select a text layer.
Tip
To open the Character panel, choose Window > Character. To open the Paragraph panel, choose Window > Paragraph.
After Effects displays sample text for each font. You can filter fonts to display only fonts from Adobe or favorites you’ve marked.
- Select the Snorkel Tours text layer in the Timeline panel.
- In the Properties panel, choose Calluna Sans Bold from the Font Family menu.
Tip
To select a font quickly, begin typing its name in the Font Family box. The Font Family menu jumps to the first font on your system that matches the letters you’ve typed. If a type layer is selected, the text in the Composition panel is formatted with the newly selected font.
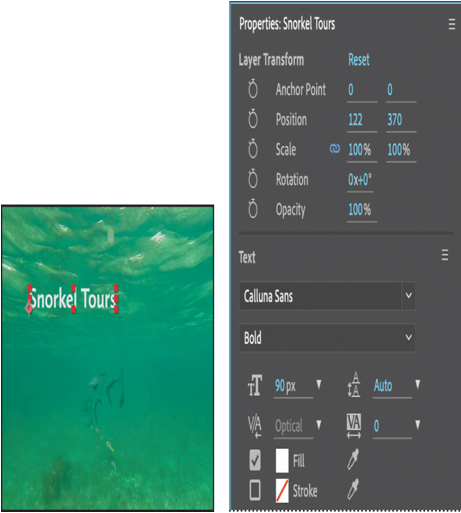
3. Set the Font Size to 90 pixels, and make sure no stroke is selected.
4. Leave all other options at their default settings.
Formatting paragraph attributes
Use the Paragraph section of the Properties panel to set options that apply to an entire paragraph, such as alignment, indentation, and leading. For point text, each line is a separate paragraph. You can set formatting options for a single paragraph, multiple paragraphs, or all paragraphs in a text layer. You just need to make one adjustment for this composition’s title text.
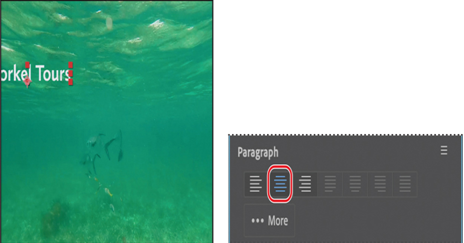
- In the Paragraph section of the Properties panel, click the Center Text button. This aligns horizontal text to the center of the layer, not to the center of the composition.
Note
Your screen may look different, depending on where you started typing.
2. Leave all other options at their default settings.
More DetailsJan 9, 2022
Installing a font using Adobe Fonts – Animating Text
Hundreds of fonts are available through Adobe Fonts, which is included with an Adobe Creative Cloud membership. You’ll use Adobe Fonts to install a font that will work well for the title text. When you install an Adobe Fonts font on your system, it’s available in any application.
1. Choose File > Add Fonts From Adobe.
After Effects opens the Adobe Fonts page in your default browser.
2. Make sure you’re signed in to Creative Cloud. If not, click Sign In at the top of the screen, and then enter your Adobe ID.
3. Type Snorkel Tours in the sample text field. If you don’t see all the text, move the slider to change the text size.
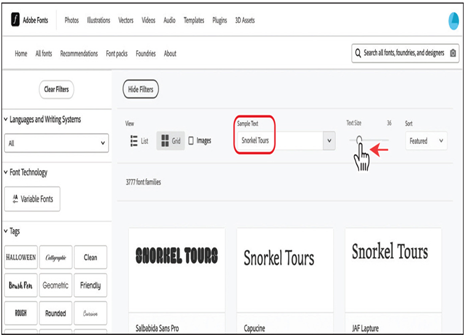
Using your own text as the sample text lets you get a feel for how a font will work in your project.
You can browse fonts on the Adobe Fonts website, but because there are so many, it’s often more efficient to filter them or to search for a specific font. You’ll filter fonts to see those that meet your requirements.
4. Choose Name from the Sort menu in the upper right corner. Then, on the left side of the page, hide the Tags area, and select Sans Serif in the Classification area. In the Properties area, select the buttons for medium weight, medium width, medium x-height, low contrast, and standard capitalization.
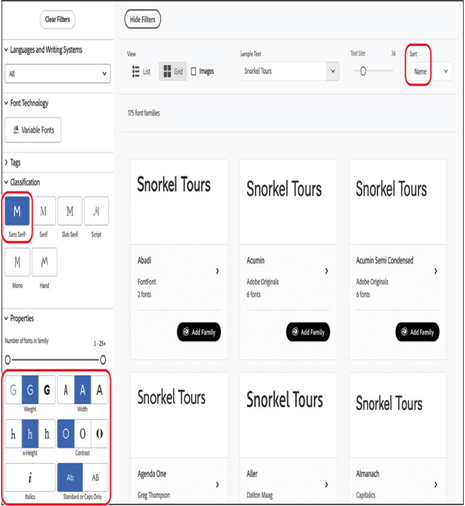
Adobe Fonts displays several fonts that meet the requirements you specified.
5. Browse a few pages’ worth of fonts to see what’s available. Calluna Sans, which is probably on the third page, will work nicely.
6. Click Calluna Sans.
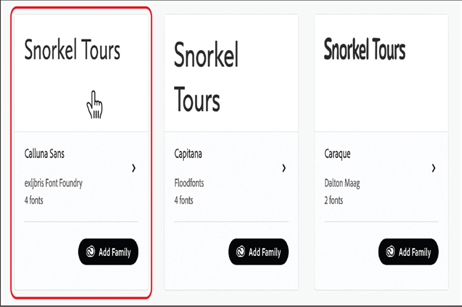
Adobe Fonts displays an image with the font in context and sample text for all the fonts in the selected family as well as additional information about the font.
7. Click Add Font next to the Regular and Bold versions of the font.
Note
Depending on your system and your Internet connection, it may take a few minutes for Adobe Fonts to activate your fonts.
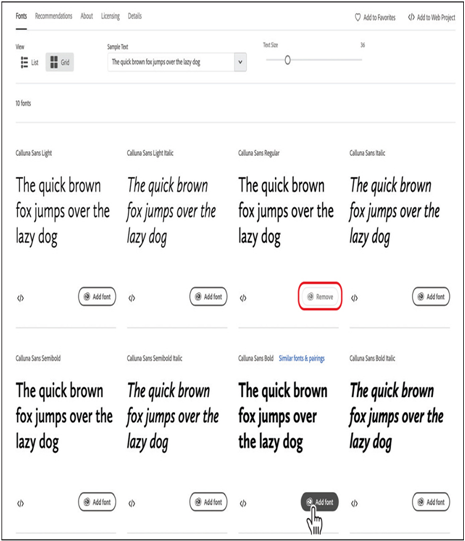
The selected fonts are automatically added to your system and are then available in any application, including After Effects. After you’ve activated your fonts, you can close Adobe Fonts and your browser.
More DetailsDec 30, 2021
Creating the composition – Animating Text
First, you’ll import footage and create the composition.
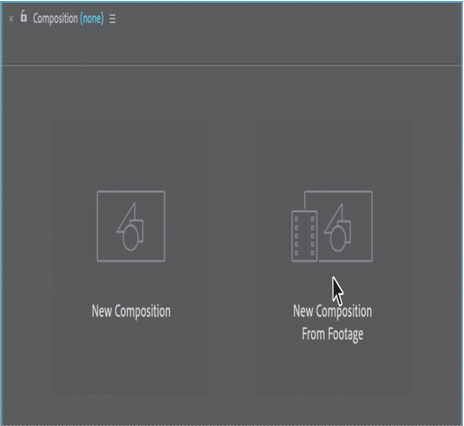
- Click the New Composition From Footage button in the Composition panel to create a new composition.
2. Navigate to the Lessons/Lesson03/Assets folder on your hard disk, select FishSwim.mov, and then click Import or Open.
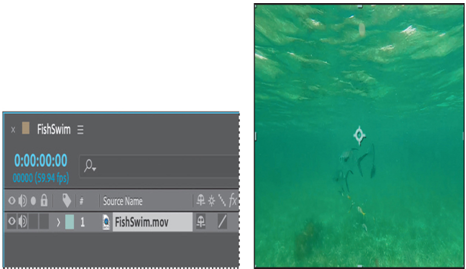
After Effects can import several file formats, including Adobe Photoshop and Adobe Illustrator files as well as QuickTime and AVI movies. This makes After Effects an incredibly powerful application for compositing and motion graphics work.
3. Choose File > Save.
You’re ready to add the title text to the composition.
About text layers
In After Effects, you can add text with flexibility and precision. The Tools, Character, and Paragraph panels contain a wide range of text controls; some of these are also available in the Properties panel. You can create and edit horizontal or vertical text directly on the screen in the Composition panel, and quickly change the font, style, size, and color of the text. You can apply changes to individual characters and set formatting options for entire paragraphs, including alignment, justification, and word-wrapping. In addition to all of these style features, After Effects provides tools for easily animating specific characters and properties, such as text opacity and hue.
After Effects uses two types of text: point text and paragraph text. Use point text to enter a single word or line of characters; use paragraph text to enter and format text as one or more paragraphs.
In many ways, text layers are just like any other layers in After Effects. You can apply effects and expressions to text layers, animate them, designate them as 3D layers, and edit the 3D text while viewing it from multiple angles. As with layers imported from Illustrator, text layers are continuously rasterized, so when you scale the layer or resize the text, it retains crisp, resolution-independent edges. The two main differences between text layers and other layers are that you cannot open a text layer in its own Layer panel and you can animate the text in a text layer using special text-animator properties and selectors.
More DetailsNov 8, 2021
Getting started – Animating Text
Lesson overview
In this lesson, you’ll learn how to do the following:
- Create and animate text layers.
- Stylize text using the Character, Paragraph, and Properties panels.
- Apply and customize text animation presets.
- Preview animation presets in Adobe Bridge.
- Install fonts using Adobe Fonts.
- Animate text using keyframes.
- Edit and animate imported Adobe Photoshop text.
- Use a text animator group to animate selected characters on a layer.
This lesson will take about 90 minutes to complete. If you haven’t already done so, download the project files for this lesson from peachpit.com/AfterEffectsCIB2024, following the instructions in the Getting Started section under “Accessing the lesson files and Web Edition.”

PROJECT: CORPORATE ADVERTISEMENT
Your type doesn’t need to sit still while your audience is reading it. In this lesson, you’ll learn several ways to animate type in After Effects, including timesaving methods unique to text layers.
Getting started
Adobe After Effects offers many ways to animate text. You can animate text layers by manually creating keyframes in the Timeline panel, using animation presets, or using expressions. You can even animate individual characters or words in a text layer. In this lesson, you’ll employ several different animation techniques, including some that are unique to text, while you design a promotion for snorkeling tours from the fictional Blue Crab Charters company. You’ll also take advantage of Adobe Fonts to install a font for use in your project.
As in other projects, you’ll begin by previewing the movie you’re creating, and then you’ll open After Effects.
- Make sure the following files are in the Lessons/Lesson03 folder on your hard disk, or download them from peachpit.com now:
• In the Assets folder: BlueCrabLogo.psd, FishSwim.mov, LOCATION.psd
• In the Sample_Movie folder: Lesson03.mp4 - Open and play the Lesson03.mp4 sample movie in Windows Movies & TV or QuickTime Player to see what you will create in this lesson. When you are done, close Windows Movies & TV or QuickTime Player. You may delete the sample movie from your hard disk if you have limited storage space.
As you start the application, restore the default settings for After Effects. See “Restoring default preferences” on page 3.
3. Start After Effects, and then immediately hold down Ctrl+Alt+Shift (Windows) or Command+Option+Shift (macOS) to restore default preferences settings. In the Startup Repair Options dialog box, click Reset Preferences.
4. Click New Project in the Home window.
After Effects opens to display a blank, untitled project.
5. Choose File > Save As > Save As, and navigate to the Lessons/Lesson03/Finished_Project folder.
6. Name the project Lesson03_Finished.aep, and then click Save.
More DetailsSep 9, 2021
Rendering the composition – Creating a Basic Animation Using Effects and Presets
You’re ready to prepare your presentation intro for output. When you create output, the layers of a composition and each layer’s masks, effects, and properties are rendered frame by frame into one or more output files or, in the case of an image sequence, into a series of consecutive files.
Note
For more about output formats and rendering, see Lesson 15, “Rendering and Outputting.”
Making a movie from your final composition can take a few minutes or many hours, depending on the composition’s frame size, quality, complexity, and compression method. When you place your composition in the Render Queue, it becomes a render item that uses the render settings assigned to it.
After Effects provides a variety of formats and compression types for rendering output; the format you choose depends on the medium from which you’ll play your final output or on the requirements of your hardware, such as a video-editing system.
Note
For output to final-delivery formats, you can also use Adobe Media Encoder. You’ll learn about Adobe Media Encoder in Lesson 15, “Rendering and Outputting.”
You’ll render and export the composition so that it can be broadcast on television.
- Click the Project tab to bring the Project panel forward. If the Project tab is not visible, choose Window > Project.
- Do one of the following to add the composition to the Render Queue:
• Select the Explore Hawaii composition in the Project panel, and choose Composition > Add To Render Queue. The Render Queue panel opens automatically.
• Choose Window > Render Queue to open the Render Queue panel, and then drag the Explore Hawaii composition from the Project panel onto the Render Queue panel. - Click the arrow to expand the Render Settings options. By default, After Effects renders compositions with Best Quality and Full Resolution. The default settings are fine for this project.
- Click the arrow to expand the Output Module options. By default, After Effects uses the H.264 – Match Render Settings – 15Mbps setting to encode the rendered composition into a movie file.
- Click the blue words next to the Output To menu.
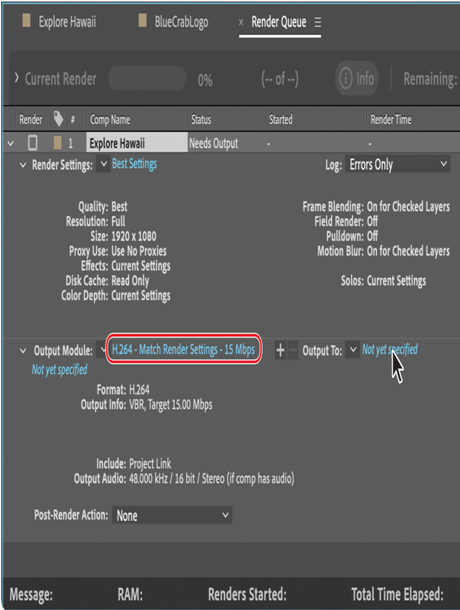
6. In the Output Movie To dialog box, accept the default movie name (Explore Hawaii), select the Lessons/Lesson02/Finished_Project folder for the location, and then click Save.
7. Back in the Render Queue panel, click the Render button.
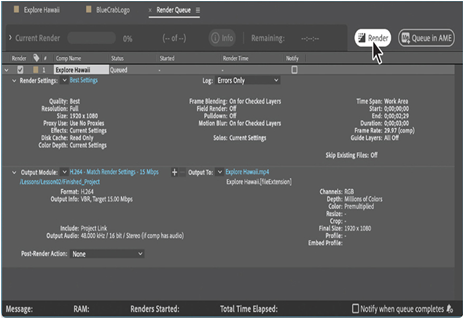
After Effects displays a progress bar in the Render Queue panel as it encodes the file, and issues an audio alert when all items in the Render Queue have been rendered and encoded.
8. If you want to see your final product, double-click the Explore Hawaii.mp4 file in the Lessons/Lesson02/Finished_Project folder to open it in Windows Media Player or QuickTime, and then play the file.
9. Save and close the project file, and then quit After Effects.
Congratulations. You’ve created a presentation intro suitable for broadcast.
Review questions
1 What is precomposing?
2 How do you customize an effect?
3 How do you modify the transparency of a layer in a composition?
Review answers
1 Precomposing is a way to nest layers within a composition. Precomposing moves the layers to a new composition, which takes the place of the selected layers. When you want to change the order in which layer components are rendered, precomposing is a quick way to create intermediate levels of nesting in an existing hierarchy.
2 After you apply an effect to a layer in a composition, you can customize its properties in the Effect Controls panel. This panel opens automatically when you apply the effect, or you can open it at any time by selecting the layer with the effect and choosing Window > Effect Controls.
3 To modify the transparency of a layer, reduce its opacity. Select the layer in the Timeline panel, and then change the Opacity value in the Properties panel. Or, in the Timeline panel, press T to reveal to reveal the layer’s Opacity property, and change it there.
More DetailsAug 15, 2021
Previewing the effects – Creating a Basic Animation Using Effects and Presets
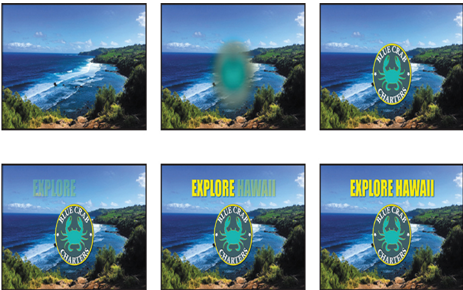
It’s time to preview all of the effects together.
- Click the Explore Hawaii tab in the Timeline panel to switch to the main composition. Press the Home key or drag the current-time indicator to make sure you’re at the beginning of the time ruler.
- Make sure the Video switch (
) is selected for both layers in the Explore Hawaii Timeline panel.
- Click the Play button (
) in the Preview panel, or press the spacebar, to watch the preview. Press the spacebar to stop playback at any time.
Adding transparency
The logo should appear semitransparently in the corner of the frame during the presentation. You’ll reduce the opacity of the logo, scale it, and shift its position so that it can be used this way.
- Still in the Explore Hawaii Timeline panel, go to 2:10.
- Select the BlueCrabLogo layer in the Timeline panel.
- In the Properties panel, click the stopwatch icon (
) next to Opacity to set a keyframe at this point in time. By default, the Opacity is 100%—fully opaque.
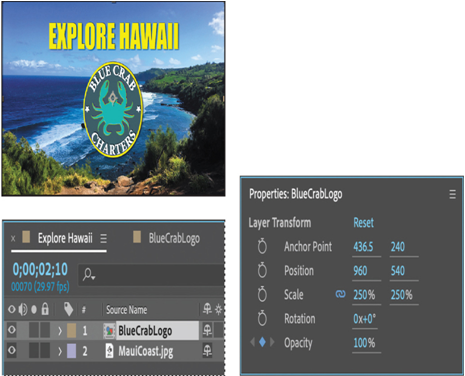
4. Press the End key or drag the current-time indicator to go to the end of the time ruler (2:29), and change the Opacity to 40%. After Effects adds a keyframe.
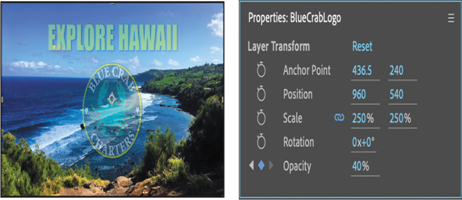
The logo appears, the words Explore Hawaii show up, and it all fades to 40% opacity.
5. Go to 2:10, and click the stopwatch icons () to set initial keyframes for both the Position and Scale properties.
6. Go to 2:25, and change the Scale to 60% and the Position to 1700, 935.
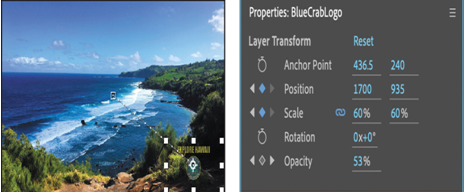
7. Click the Play button () in the Preview panel, press the spacebar, or press 0 on your numeric keypad to preview your composition.
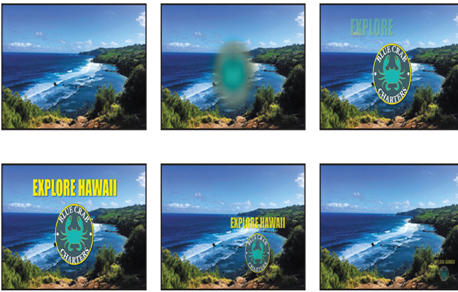
8. Press the spacebar to stop playback when you’re done.
9. Choose File > Save to save your project.
More Details