Oct 9, 2022
Importing text – Animating Text
Animating imported Photoshop text
When you just need to add a few words of text to a unique project, it works well to type directly into After Effects. But in the real world, you may need to ensure brand and style consistency among multiple projects. Fortunately, you can import text from Photoshop or Illustrator. You can preserve text layers, edit them, and animate them in After Effects.
Importing text
Some of the remaining text for this composition is in a layered Photoshop file, which you’ll import now.
- Double-click an empty area in the Project panel to open the Import File dialog box.
- Select the LOCATION.psd file in the Lessons/Lesson03/Assets folder. Choose Composition – Retain Layer Sizes from the Import As menu. (In macOS, you may need to click Options to see the Import As menu.) Then click Import or Open.
- In the LOCATION.psd dialog box, select Editable Layer Styles, and click OK.
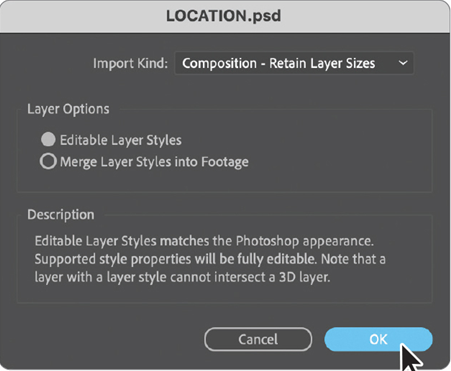
After Effects can import Photoshop layer styles, retaining the appearance of the layers you’re importing. The imported file is added as a composition to the Project panel; its layers are added in a separate folder.
4. Drag the LOCATION composition from the Project panel into the Timeline panel, placing it at the top of the layer stack.
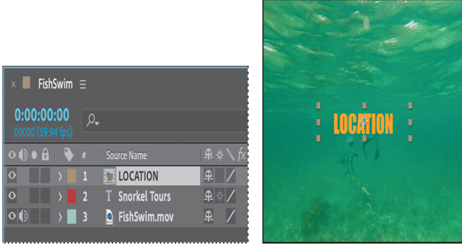
Because you imported the LOCATION.psd file as a composition with layers intact, you can work on it in its own Timeline panel, editing and animating its layers independently.
Editing imported text
The text you imported isn’t currently editable in After Effects. You’ll change that so that you can control the type and apply animations. The LOCATION.psd file is a boilerplate template for the location of company tours. You’ll edit the text and add a stroke to help it stand out for this promotion.
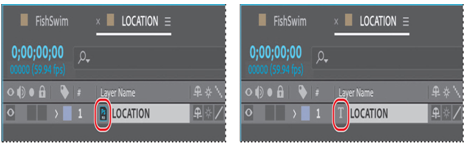
- Double-click the LOCATION composition in the Project panel to open it in its own Timeline panel.
- Select the LOCATION layer in the Timeline panel, and choose Layer > Create > Convert To Editable Text. (Click OK if you see a warning about missing fonts.)
Now the text layer can be edited, so you can customize the tour location.
3. Double-click the LOCATION layer in the Timeline panel to select the text and automatically switch to the Horizontal Type tool ().
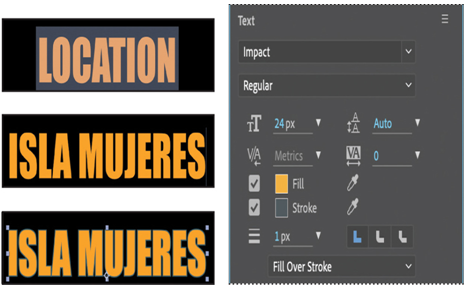
4. Type ISLA MUJERES.
Note
The layer name does not change in the Timeline panel when you change the text in the layer. This is because the original layer name was created in Photoshop. To change a layer’s name, select it in the Timeline panel, press Enter or Return, type the new name, and press Enter or Return again.
5. Switch to the Selection tool () to exit text-editing mode.
6. In the Text section of the Properties dialog box, click the Stroke color box to open it. Select a teal blue color (we used R=70, G=92, B=101), and click OK. Leave all other settings as they are.
7. Choose File > Save to save your work so far.
More Details