Nov 18, 2023
Duplicating a shape – Working with Shape Layers
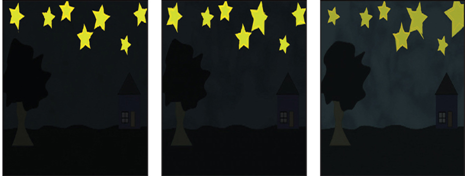
The sky should have more than one star, and they should all shimmer. You’ll duplicate the star you created multiple times so that each of the new layers has the same properties as the original. Then you’ll adjust each star’s position and rotation separately. Finally, you’ll animate the offset paths to accentuate the twinkling effect.
- Press the Home key or move the current-time indicator to the beginning of the time ruler.
- Select the Star 1 layer in the Timeline panel.
- Choose Edit > Duplicate.
After Effects adds a Star 2 layer at the top of the layer stack. It is identical to the Star 1 layer, including its position.
4. Press Ctrl+D (Windows) or Command+D (macOS) five times to create five additional star layers.
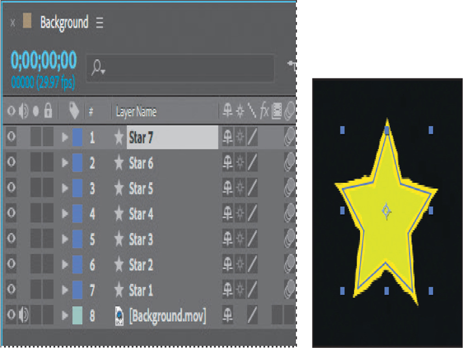
5. Select the Selection tool () in the Tools panel, and press F2 to deselect all layers in the Timeline panel.
Adjusting the position, scale, and rotation of each shape
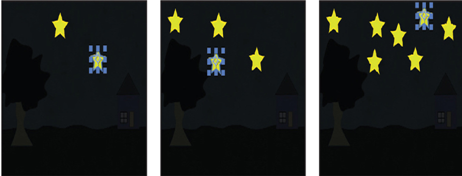
The stars you created are all on top of each other. You’ll customize the position, scale, and angle of rotation for each.
- Using the Selection tool, drag each star to a different position in the sky.
2. Select the Star 1 layer, and then adjust its Rotation and Scale values in the Properties panel.
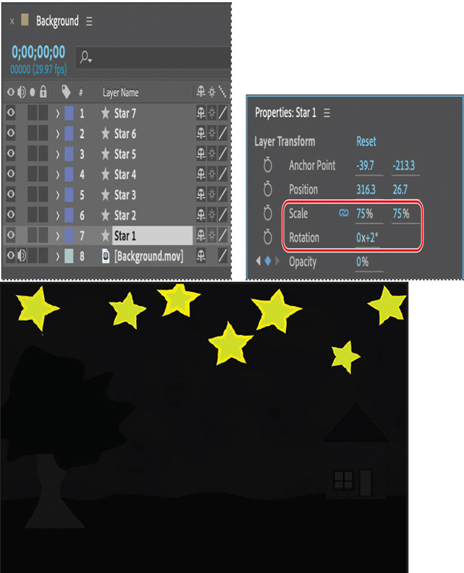
3. Adjust the Rotation and Scale values for each of the other layers to create variation among the stars. You can also use the Selection tool to adjust the stars’ positions.
4. Press the spacebar to preview the animation. The stars twinkle and fade as night turns to day. Press the spacebar again to stop the playback.
Animating concentric shapes
You’ll enhance the twinkling effect by animating the stroke for each star.
- Press the Home key or move the current-time indicator to the beginning of the time ruler.
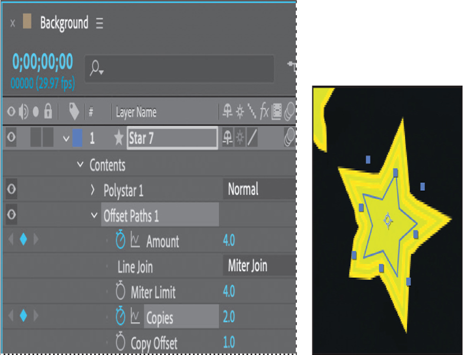
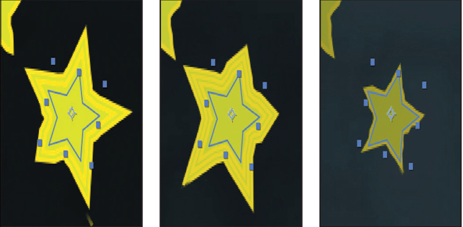
- Expand the properties for the Star 7 layer, and then choose Offset Paths from the Add menu.
The selected star expands in the Composition panel; its stroke has been repeated multiple times.
3. Expand the Offset Paths 1 properties in the Timeline panel.
4. Reduce the Amount to 4, and increase Copies to 2.
The Amount value determines how much the shape expands; positive values expand the stroke outward, and negative values send it inward. Increase the number of Copies to add repetition.
5. Click the stopwatch icon () next to the Amount and Copies properties to create initial keyframes.
6. Go to 0:10, and change the Copies to 3. Then, go to 1:00, and change the Amount to 1 and the Copies to 1.
7. Repeat steps 2–6 for each of the other stars, varying the timing and settings so that they expand and contract at different times.
8. Hide the properties for all layers. Then select the Star 1 layer and Shift-select the Star 7 layer to select all the star layers.
9. Choose Layer > Pre-compose, name the new composition Starscape, and click OK.
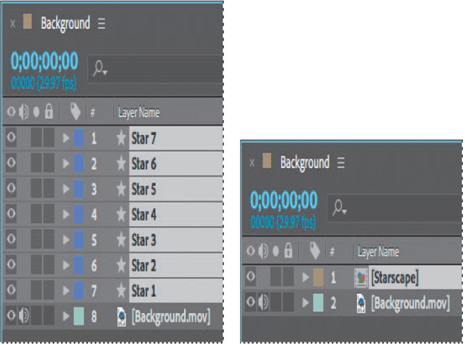
After Effects creates a new composition named Starscape that contains the seven star shapes; the new composition replaces the layers in the Background composition. You can continue to edit the star layers by opening the Starscape composition, but precomposing the layers keeps the Timeline panel organized.
10. Choose File > Save to save your work so far.