Apr 23, 2024
Drawing tapered strokes with the Pen tool – Working with Shape Layers
Animating using parenting
When you parent one layer to another, the child layer adopts the attributes of the parent layer. You’ll draw a stem and leaves to meet the falling star. You can simply parent the leaves and stem to ensure they move together.
Drawing tapered strokes with the Pen tool
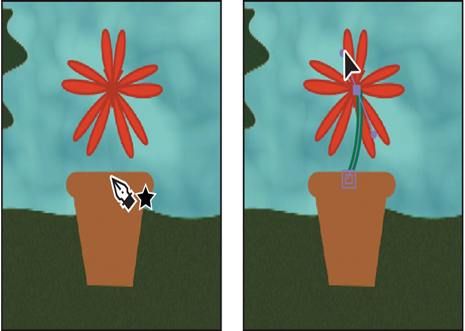
First you’ll draw the stem. It will have a slightly thicker stroke than the flower, but no fill, and its tapered end will rise to meet the flower.
- Go to 4:20, when the flower is in its final position.
- Select the Pen tool in the Tools panel.
- Click the word Fill to open the Fill Options dialog box, and then select the None option, and click OK.
- Click the Stroke Color box in the Tools panel, change the stroke color to green (we used R=44, G=73, B=62), and click OK. Change the Stroke Width to 10 px.
- Click just below the rim of the flowerpot to create an initial vertex, and then click at the center of the flower. Before releasing the mouse, drag the Bezier handle to create a subtle curve in the stem.
6. Select the Shape Layer 1 layer, press Enter or Return, change its name to Stem, and press Enter or Return again.
7.In the Timeline panel, move the Stem layer below the Base of Flowerpot layer so it’s inside the pot, not outside of it.
8.Expand the Stem layer properties, and then expand Contents > Shape 1 > Stroke 1 > Taper. Change the End Length to 83%.
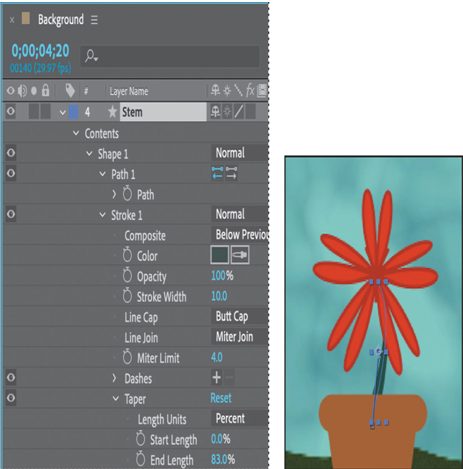
The Length values determine how quickly the stroke tapers. Start Length tapers the stroke at its starting point; End Length tapers the stroke’s end point. Width determines how much the stroke tapers, and Ease determines how sharp the tapered end is.
9. With the Stem layer selected, click the stopwatch icon () next to the Position property in the Properties panel to create an initial keyframe at its final position.
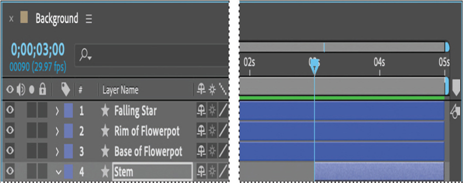
10. Go to 3:00, and press Alt+[ (Windows) or Option+[ (macOS) to set the In point of the layer to the current time.
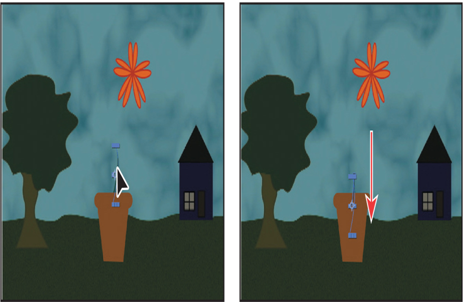
11. Select the Selection tool () in the Tools panel, and drag the stem down so that it is completely below the top of the flowerpot. Press Shift as you drag to move it straight down.
Tip
If you haven’t already deselected the Snapping option, you may need to deselect it now in order to position the stem where you want it.
The stem will begin to emerge from the pot at 3:00.
12. Hide the properties for the Stem layer.