Dec 24, 2023
Creating custom shapes with the Pen tool – Working with Shape Layers
You can use the five shape tools to create a wide variety of shapes. However, the real power in using shape layers is that you can draw any shape and manipulate it in a myriad of ways.
You’ll use the Pen tool to draw a shape that resembles the base of a flowerpot. You’ll also animate its color so that the flowerpot is dark at the beginning of the scene, but gets lighter as the sky lightens.
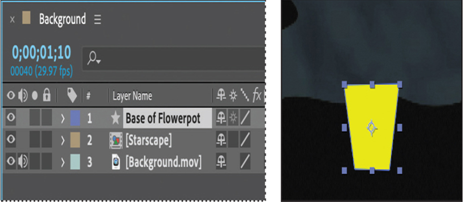
- Make sure no layers are selected in the Timeline panel, and then go to 1:10.
- Select the Pen tool (
) in the Tools panel.
- In the Composition panel, click an initial vertex, and add three more to draw a shape that resembles the base of a flowerpot, as in the illustration. Click again in the initial vertex to close the shape.

When you create the first vertex, After Effects automatically adds a shape layer—Shape Layer 1—to the Timeline panel.
4. Select Shape Layer 1, press Enter or Return, and change the layer’s name to Base of Flowerpot. Press Enter or Return to accept the new name.
5. With the Base of Flowerpot layer selected, click the Fill Color box in the Properties panel, and select a dark brown color (we used R=62, G=40, B=22).
6. Choose None from the menu next to Stroke Color in the Properties panel.
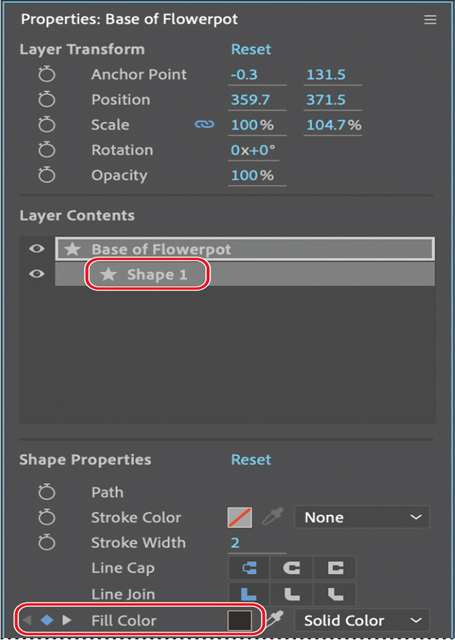
7. In the Properties panel, select Shape 1 in the Layer Contents section.
8. Click the stopwatch icon next to the Fill Color property to create an initial keyframe.
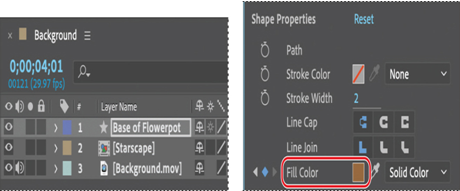
9. Go to 4:01, click the Fill Color box, and change the fill color to a lighter brown. (We used R=153, G=102, B=59.) Then click OK.
10. Hide all layer properties in the Timeline panel. Press F2 or click an empty area in the Timeline panel to deselect all layers.
Positioning layers with snapping
Now you’ll create the rim of the flowerpot and position it atop the base using the snapping feature in After Effects.
More Details