Jun 3, 2024
Using nulls to connect points – Working with Shape Layers
You’ve learned that parenting connects one layer to another. Sometimes you want to connect a single point to another layer—for example, the top of the stem in your animation to the flower itself. The Create Nulls From Paths panel lets you do just that. A null object is an invisible layer that has all the same properties as other layers so that it can serve as a parent to any layer. The Create Nulls From Paths panel creates null objects based on specific points, which you can then parent to other layers without having to write complex expressions.
There are three options in the Create Nulls From Paths panel: Points Follow Nulls creates nulls that control the position of the path points; Nulls Follow Points creates nulls that are controlled by the positions of the path points; and Trace Path creates a single null with its position linked to the coordinates of the path.
Note
The Create Nulls From Paths panel works only with masks or with Bezier shapes (shapes drawn with the Pen tool). To convert a shape drawn with a shape tool to a Bezier path, expand the shape layer contents, right-click the path (e.g., Rectangle 1), and choose Convert To Bezier Path.
You’ll create a null for the point at the top of the stem, and then you’ll join that null to the flower so the two remain connected even as the flower moves.
- Go to 4:20 so you can see the stem and leaves well.
- Choose Window > Create Nulls From Paths.jsx.
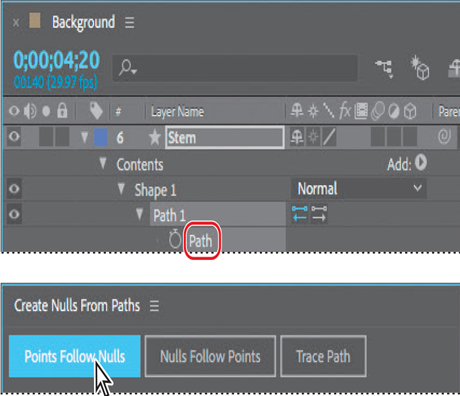
- Expand the Stem layer in the Timeline panel, and then expand Contents > Shape 1 > Path 1.
- Select Path.
You must select a path in the Timeline panel in order to create a null using the options in the Create Nulls From Paths panel.
5.Click Points Follow Nulls in the Create Nulls From Paths panel.
After Effects creates two nulls, corresponding to the two points on the stem path. The null objects appear in gold in the Composition panel, and as layers named Stem: Path 1 [1.1.0] and Stem: Path 1 [1.1.1] in the Timeline panel. You only need the null for the top point.
Note
After you create the nulls, you can close the Create Nulls From Paths panel, or you can leave it open.
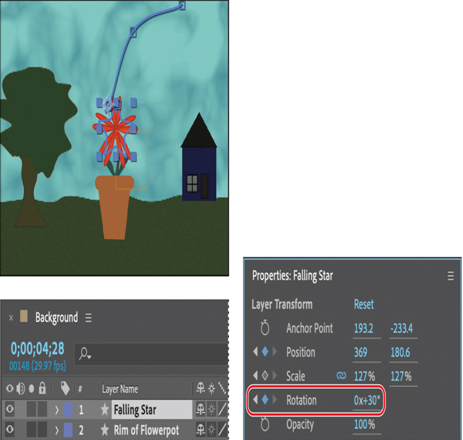
6.Select the null that corresponds to the bottom point of the stem, and delete it.
7.In the Timeline panel, drag the pick whip () from the Stem: Path 1 [1.1.1] layer to the Falling Star layer.

8.Move the current-time indicator across the time ruler to see how the stem connects to the flower.
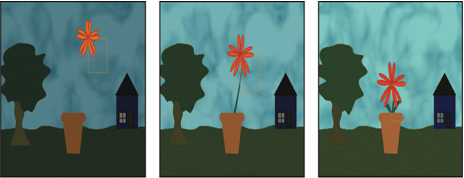
You’ll animate the flower subtly, and the stem will move with it.
9.Go to 4:28, and use the Selection tool to move the flower a bit to the right as if it had been moved by the wind.
10.Select the Falling Star layer. Go to 4:20, and click the stopwatch icon () next to the Rotation property in the Properties panel to create an initial keyframe at its original rotation. Go to 4:28, and change the rotation to 30°.
11.Choose File > Save to save your work.