Mar 26, 2024
Animating position and scale – Working with Shape Layers
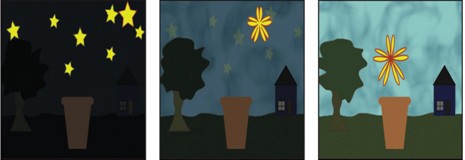
The star becomes a flower, but it should be falling as it changes. You’ll animate its position and scale now.
- Press the Home key or move the current-time indicator to the beginning of the time ruler.
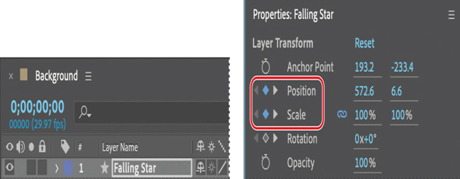
- Select the Falling Star layer in the Timeline panel. In the Properties panel, click the stopwatch icon (
) next to the Position and Scale properties to create initial keyframes at their current values.
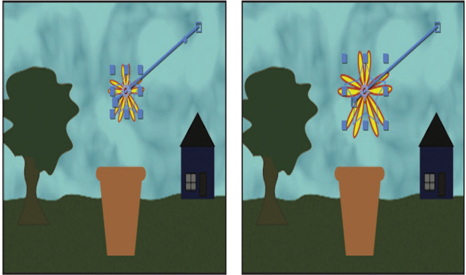
3. Go to 4:20. Select the Selection tool. Then move the star to the center of the screen, hovering above the flowerpot between the tree and the house, so that it’s in its final position. (You may need to deselect Snapping in the Tools panel to position the flower where you want it.) At this point, the star has become a flower, but it hasn’t changed size.

After Effects creates a Position keyframe.
4. Go to 4:01. Increase the Scale value so that the flower is about the width of the flowerpot. The value you use depends on the original size of the star and on the width of the flowerpot.
5. Press the spacebar to preview the animation. The star falls as it becomes a flower, but its trajectory is straight. You want it to fall in a slight arc. Press the spacebar again to stop playback.
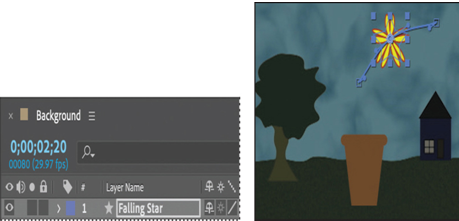
6. Go to 2:20, and adjust the star’s position up, so that its path becomes a gentler arc.
7. Press the spacebar to preview the star’s path again, and then press the spacebar to stop playback. If you want to change the path, you can add Position keyframes at other points in the time ruler.
8. Hide the properties for the Falling Star layer.
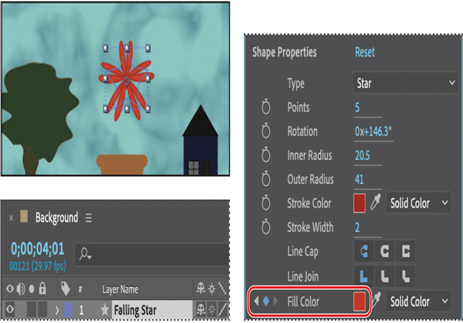
Animating fill color
Currently, the star remains yellow with a red stroke as it becomes a flower. You’ll animate its fill color so that the final flower is red.
- Press the Home key or move the current-time indicator to the beginning of the time ruler.
- Select the Falling Star layer, and then click the stopwatch icon (
) next to the Fill Color property in the Properties panel to create an initial keyframe.
- Go to 4:01, and change the fill color to a red color. (We used R=192, G=49, B=33.)
4. Hide all layer properties. Press F2 or click an empty area in the Timeline panel to deselect all layers.
5. Press the spacebar to preview your animation. Press the spacebar again to stop playback. Then, choose File > Save to save your work so far.
More Details