Oct 25, 2023
Applying a fill and stroke – Working with Shape Layers
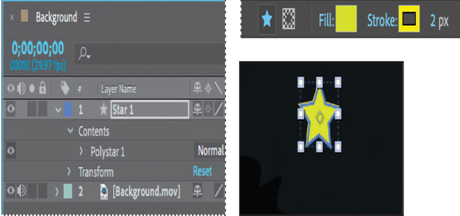
You can change the color of a shape by modifying its Fill settings in the Tools panel. Clicking the word Fill opens the Fill Options dialog box, where you can select the kind of fill, its blending mode, and its opacity. Clicking the Fill Color box opens the Adobe Color Picker if the fill is solid or the Gradient Editor if the fill is a gradient.
Similarly, you can change the color and width of the stroke of a shape by modifying its Stroke settings in the Tools panel. Click the word Stroke to open the Stroke Options dialog box; click the Stroke Color box to select a color.
- Select the Star 1 layer in the Timeline panel.
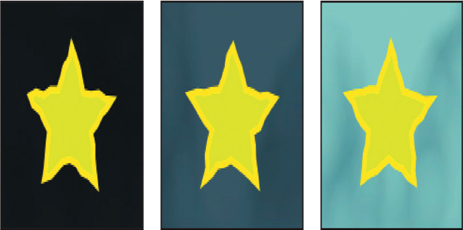
- Click the Fill Color box to open the Shape Fill Color dialog box.
- Change the color to a bright yellow (we used R=215, G=234, B=23), and click OK.
- Click the Stroke Color box, change the stroke color to an even brighter yellow color (we used R=252, G=245, B=3), and then click OK.
- Make sure the Stroke Width value is 2 px.
6. Choose File > Save to save your work so far.
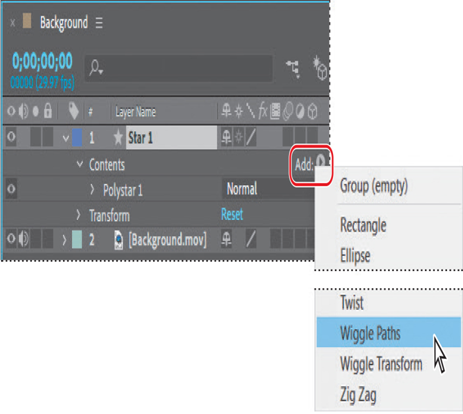
Creating a self-animating shape
Wiggle Paths is a path operation that turns a smooth shape into a series of jagged peaks and valleys. You’ll use it to make the star shimmer a little. Because the operation is self-animating, you need to change only a few properties for the entire shape to move on its own.
- Expand the Star 1 layer in the Timeline panel, if it isn’t already expanded, and choose Wiggle Paths from the Add pop-up menu.
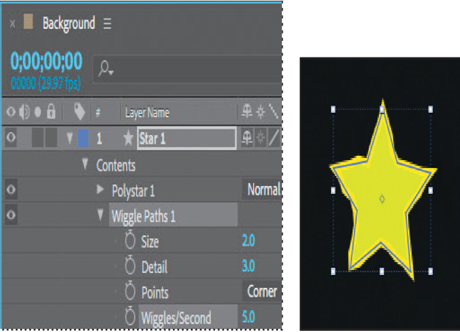
2. Press the spacebar to play the movie so you can see the effect. Press the spacebar again to stop playback.
The star’s edge is too jagged. You’ll change the settings for a subtler effect.
3. Expand Wiggle Paths 1. Then change the Size to 2.0 and the Detail to 3.0.
4. Change Wiggles/Second to 5.0.
5. Click the Motion Blur switch () for the layer.
When you enable Motion Blur for a layer, After Effects enables it for the entire composition, so that you can apply Motion Blur to any additional layers.
6. Hide the layer properties.
7. Press the spacebar to preview the star’s effect; press it again to stop playback.
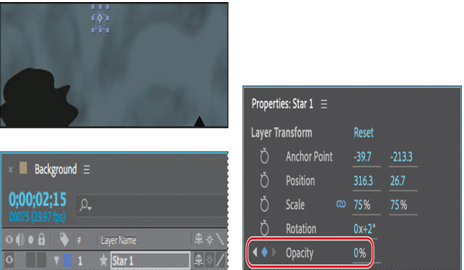
The star shouldn’t be visible during the daytime, so you’ll animate its Opacity value.
8. Press the Home key or move the current-time indicator to the beginning of the time ruler.
9. Select the Star 1 layer in the Timeline panel.
10. In the Layer Transform section of the Properties panel, click the stopwatch icon () for Opacity to create an initial keyframe at 100%.
11. Go to 2:15, and change the Opacity value to 0%.