Dec 18, 2022
Applying a tracking preset – Animating Text
First you’ll create the text, and then you’ll add a tracking preset.
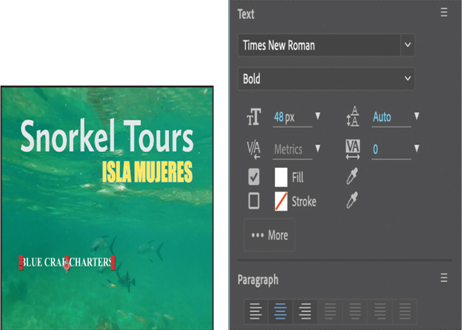
- Select the Horizontal Type tool (
), and then type BLUE CRAB CHARTERS.
- Select the BLUE CRAB CHARTERS layer. In the Properties panel, choose Times New Roman Bold from the Font Family menu, choose 48 px from the Font Size menu, set the Fill to white, and deselect Stroke. In the Paragraph section of the panel, make sure Center Text is selected.
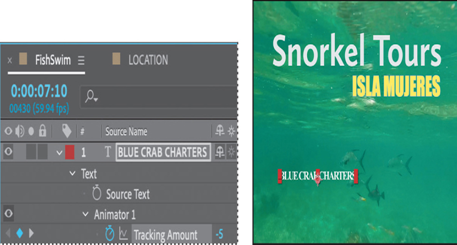
- Go to 7:10.
- Use the Selection tool (
) to move the BLUE CRAB CHARTERS layer down to the lower third of the screen, aligned with Snorkel Tours, as in the image below.
5. Open the Effects & Presets panel. Then type Increase Tracking in the search box, and double-click the preset to apply it to the BLUE CRAB CHARTERS layer.
6. Drag the current-time indicator across the time ruler between 7:10 and 9:10 to manually preview the tracking animation.

Customizing the tracking animation preset
The text expands, but you want the letters to be so close initially that they’re nearly on top of each other, and then to expand to a reasonable, readable distance apart. The animation should also occur more quickly. You’ll adjust the Tracking Amount to achieve both goals.
- Select the BLUE CRAB CHARTERS layer in the Timeline panel, and press UU to reveal the properties that were modified.
- Go to 7:10.
- Under Animator 1, change the Tracking Amount to −5 so that the letters are squeezed together.
4. Click the Go To Next Keyframe arrow () for the Tracking Amount property, and then change the value to 0.
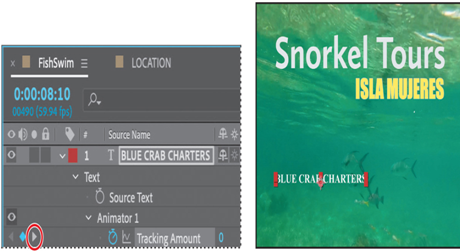
5. Drag the current-time indicator across the time ruler between 7:10 and 8:10. The letters expand, and stop animating at the last keyframe.
6. Hide the properties for all layers.
Animating text opacity
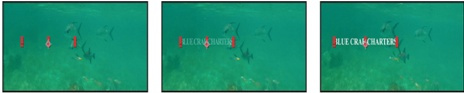
You’ll take the animation of the company name a little further by having it fade onscreen as the letters expand. To do this, you’ll animate the layer’s Opacity property.
- Make sure the BLUE CRAB CHARTERS layer is selected.
- Go to 7:10. In the Properties panel, set the Opacity to 0%. Then click the stopwatch icon (
) to set an Opacity keyframe.
- Go to 7:20, and set the Opacity to 100%. After Effects adds a second keyframe.
Now the letters of the company name will fade in as they expand onscreen.
4. Drag the current-time indicator across the time ruler between 7:10 and 8:10 to see the letters of the company fade in as they spread out.
5. Right-click (Windows) or Control-click (macOS) the ending Opacity keyframe, and choose Keyframe Assistant > Easy Ease In.
6. Choose File > Save.
More Details