Sep 9, 2021
Rendering the composition – Creating a Basic Animation Using Effects and Presets
You’re ready to prepare your presentation intro for output. When you create output, the layers of a composition and each layer’s masks, effects, and properties are rendered frame by frame into one or more output files or, in the case of an image sequence, into a series of consecutive files.
Note
For more about output formats and rendering, see Lesson 15, “Rendering and Outputting.”
Making a movie from your final composition can take a few minutes or many hours, depending on the composition’s frame size, quality, complexity, and compression method. When you place your composition in the Render Queue, it becomes a render item that uses the render settings assigned to it.
After Effects provides a variety of formats and compression types for rendering output; the format you choose depends on the medium from which you’ll play your final output or on the requirements of your hardware, such as a video-editing system.
Note
For output to final-delivery formats, you can also use Adobe Media Encoder. You’ll learn about Adobe Media Encoder in Lesson 15, “Rendering and Outputting.”
You’ll render and export the composition so that it can be broadcast on television.
- Click the Project tab to bring the Project panel forward. If the Project tab is not visible, choose Window > Project.
- Do one of the following to add the composition to the Render Queue:
• Select the Explore Hawaii composition in the Project panel, and choose Composition > Add To Render Queue. The Render Queue panel opens automatically.
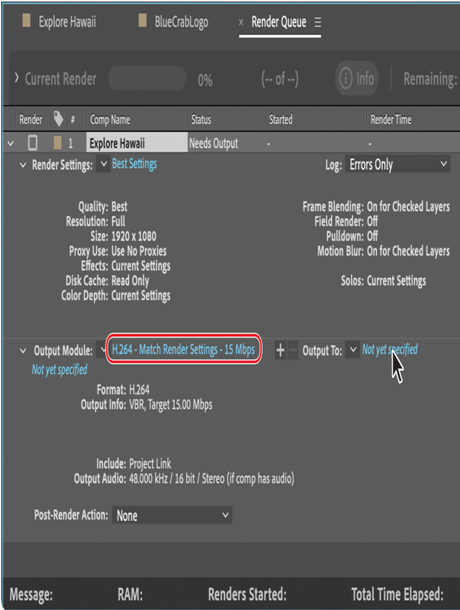
• Choose Window > Render Queue to open the Render Queue panel, and then drag the Explore Hawaii composition from the Project panel onto the Render Queue panel. - Click the arrow to expand the Render Settings options. By default, After Effects renders compositions with Best Quality and Full Resolution. The default settings are fine for this project.
- Click the arrow to expand the Output Module options. By default, After Effects uses the H.264 – Match Render Settings – 15Mbps setting to encode the rendered composition into a movie file.
- Click the blue words next to the Output To menu.
6. In the Output Movie To dialog box, accept the default movie name (Explore Hawaii), select the Lessons/Lesson02/Finished_Project folder for the location, and then click Save.
7. Back in the Render Queue panel, click the Render button.
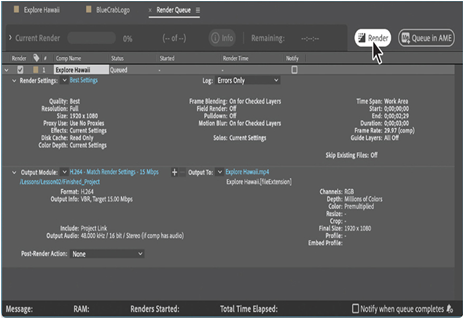
After Effects displays a progress bar in the Render Queue panel as it encodes the file, and issues an audio alert when all items in the Render Queue have been rendered and encoded.
8. If you want to see your final product, double-click the Explore Hawaii.mp4 file in the Lessons/Lesson02/Finished_Project folder to open it in Windows Media Player or QuickTime, and then play the file.
9. Save and close the project file, and then quit After Effects.
Congratulations. You’ve created a presentation intro suitable for broadcast.
Review questions
1 What is precomposing?
2 How do you customize an effect?
3 How do you modify the transparency of a layer in a composition?
Review answers
1 Precomposing is a way to nest layers within a composition. Precomposing moves the layers to a new composition, which takes the place of the selected layers. When you want to change the order in which layer components are rendered, precomposing is a quick way to create intermediate levels of nesting in an existing hierarchy.
2 After you apply an effect to a layer in a composition, you can customize its properties in the Effect Controls panel. This panel opens automatically when you apply the effect, or you can open it at any time by selecting the layer with the effect and choosing Window > Effect Controls.
3 To modify the transparency of a layer, reduce its opacity. Select the layer in the Timeline panel, and then change the Opacity value in the Properties panel. Or, in the Timeline panel, press T to reveal to reveal the layer’s Opacity property, and change it there.
More Details