Dec 30, 2021
Creating the composition – Animating Text
First, you’ll import footage and create the composition.
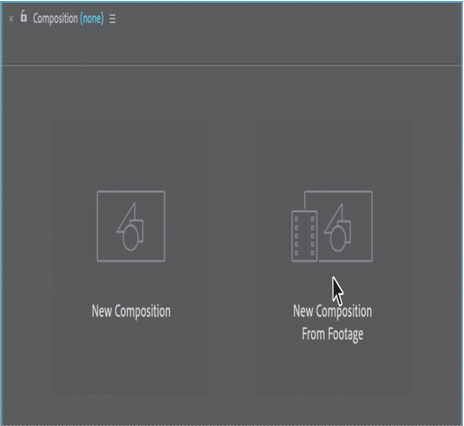
- Click the New Composition From Footage button in the Composition panel to create a new composition.
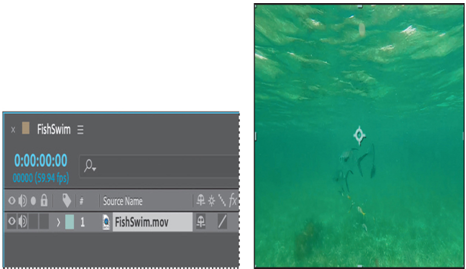
2. Navigate to the Lessons/Lesson03/Assets folder on your hard disk, select FishSwim.mov, and then click Import or Open.
After Effects can import several file formats, including Adobe Photoshop and Adobe Illustrator files as well as QuickTime and AVI movies. This makes After Effects an incredibly powerful application for compositing and motion graphics work.
3. Choose File > Save.
You’re ready to add the title text to the composition.
About text layers
In After Effects, you can add text with flexibility and precision. The Tools, Character, and Paragraph panels contain a wide range of text controls; some of these are also available in the Properties panel. You can create and edit horizontal or vertical text directly on the screen in the Composition panel, and quickly change the font, style, size, and color of the text. You can apply changes to individual characters and set formatting options for entire paragraphs, including alignment, justification, and word-wrapping. In addition to all of these style features, After Effects provides tools for easily animating specific characters and properties, such as text opacity and hue.
After Effects uses two types of text: point text and paragraph text. Use point text to enter a single word or line of characters; use paragraph text to enter and format text as one or more paragraphs.
In many ways, text layers are just like any other layers in After Effects. You can apply effects and expressions to text layers, animate them, designate them as 3D layers, and edit the 3D text while viewing it from multiple angles. As with layers imported from Illustrator, text layers are continuously rasterized, so when you scale the layer or resize the text, it retains crisp, resolution-independent edges. The two main differences between text layers and other layers are that you cannot open a text layer in its own Layer panel and you can animate the text in a text layer using special text-animator properties and selectors.
More DetailsNov 8, 2021
Getting started – Animating Text
Lesson overview
In this lesson, you’ll learn how to do the following:
- Create and animate text layers.
- Stylize text using the Character, Paragraph, and Properties panels.
- Apply and customize text animation presets.
- Preview animation presets in Adobe Bridge.
- Install fonts using Adobe Fonts.
- Animate text using keyframes.
- Edit and animate imported Adobe Photoshop text.
- Use a text animator group to animate selected characters on a layer.
This lesson will take about 90 minutes to complete. If you haven’t already done so, download the project files for this lesson from peachpit.com/AfterEffectsCIB2024, following the instructions in the Getting Started section under “Accessing the lesson files and Web Edition.”

PROJECT: CORPORATE ADVERTISEMENT
Your type doesn’t need to sit still while your audience is reading it. In this lesson, you’ll learn several ways to animate type in After Effects, including timesaving methods unique to text layers.
Getting started
Adobe After Effects offers many ways to animate text. You can animate text layers by manually creating keyframes in the Timeline panel, using animation presets, or using expressions. You can even animate individual characters or words in a text layer. In this lesson, you’ll employ several different animation techniques, including some that are unique to text, while you design a promotion for snorkeling tours from the fictional Blue Crab Charters company. You’ll also take advantage of Adobe Fonts to install a font for use in your project.
As in other projects, you’ll begin by previewing the movie you’re creating, and then you’ll open After Effects.
- Make sure the following files are in the Lessons/Lesson03 folder on your hard disk, or download them from peachpit.com now:
• In the Assets folder: BlueCrabLogo.psd, FishSwim.mov, LOCATION.psd
• In the Sample_Movie folder: Lesson03.mp4 - Open and play the Lesson03.mp4 sample movie in Windows Movies & TV or QuickTime Player to see what you will create in this lesson. When you are done, close Windows Movies & TV or QuickTime Player. You may delete the sample movie from your hard disk if you have limited storage space.
As you start the application, restore the default settings for After Effects. See “Restoring default preferences” on page 3.
3. Start After Effects, and then immediately hold down Ctrl+Alt+Shift (Windows) or Command+Option+Shift (macOS) to restore default preferences settings. In the Startup Repair Options dialog box, click Reset Preferences.
4. Click New Project in the Home window.
After Effects opens to display a blank, untitled project.
5. Choose File > Save As > Save As, and navigate to the Lessons/Lesson03/Finished_Project folder.
6. Name the project Lesson03_Finished.aep, and then click Save.
More DetailsSep 9, 2021
Rendering the composition – Creating a Basic Animation Using Effects and Presets
You’re ready to prepare your presentation intro for output. When you create output, the layers of a composition and each layer’s masks, effects, and properties are rendered frame by frame into one or more output files or, in the case of an image sequence, into a series of consecutive files.
Note
For more about output formats and rendering, see Lesson 15, “Rendering and Outputting.”
Making a movie from your final composition can take a few minutes or many hours, depending on the composition’s frame size, quality, complexity, and compression method. When you place your composition in the Render Queue, it becomes a render item that uses the render settings assigned to it.
After Effects provides a variety of formats and compression types for rendering output; the format you choose depends on the medium from which you’ll play your final output or on the requirements of your hardware, such as a video-editing system.
Note
For output to final-delivery formats, you can also use Adobe Media Encoder. You’ll learn about Adobe Media Encoder in Lesson 15, “Rendering and Outputting.”
You’ll render and export the composition so that it can be broadcast on television.
- Click the Project tab to bring the Project panel forward. If the Project tab is not visible, choose Window > Project.
- Do one of the following to add the composition to the Render Queue:
• Select the Explore Hawaii composition in the Project panel, and choose Composition > Add To Render Queue. The Render Queue panel opens automatically.
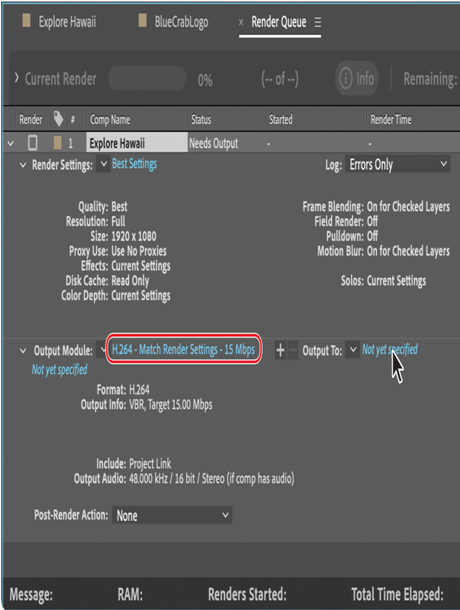
• Choose Window > Render Queue to open the Render Queue panel, and then drag the Explore Hawaii composition from the Project panel onto the Render Queue panel. - Click the arrow to expand the Render Settings options. By default, After Effects renders compositions with Best Quality and Full Resolution. The default settings are fine for this project.
- Click the arrow to expand the Output Module options. By default, After Effects uses the H.264 – Match Render Settings – 15Mbps setting to encode the rendered composition into a movie file.
- Click the blue words next to the Output To menu.
6. In the Output Movie To dialog box, accept the default movie name (Explore Hawaii), select the Lessons/Lesson02/Finished_Project folder for the location, and then click Save.
7. Back in the Render Queue panel, click the Render button.
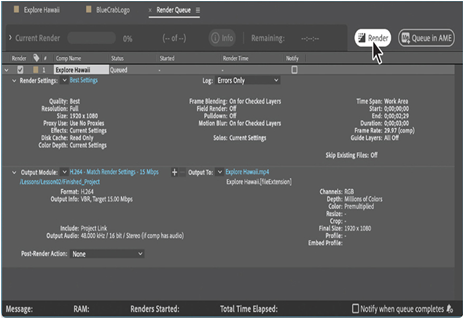
After Effects displays a progress bar in the Render Queue panel as it encodes the file, and issues an audio alert when all items in the Render Queue have been rendered and encoded.
8. If you want to see your final product, double-click the Explore Hawaii.mp4 file in the Lessons/Lesson02/Finished_Project folder to open it in Windows Media Player or QuickTime, and then play the file.
9. Save and close the project file, and then quit After Effects.
Congratulations. You’ve created a presentation intro suitable for broadcast.
Review questions
1 What is precomposing?
2 How do you customize an effect?
3 How do you modify the transparency of a layer in a composition?
Review answers
1 Precomposing is a way to nest layers within a composition. Precomposing moves the layers to a new composition, which takes the place of the selected layers. When you want to change the order in which layer components are rendered, precomposing is a quick way to create intermediate levels of nesting in an existing hierarchy.
2 After you apply an effect to a layer in a composition, you can customize its properties in the Effect Controls panel. This panel opens automatically when you apply the effect, or you can open it at any time by selecting the layer with the effect and choosing Window > Effect Controls.
3 To modify the transparency of a layer, reduce its opacity. Select the layer in the Timeline panel, and then change the Opacity value in the Properties panel. Or, in the Timeline panel, press T to reveal to reveal the layer’s Opacity property, and change it there.
More DetailsAug 15, 2021
Previewing the effects – Creating a Basic Animation Using Effects and Presets
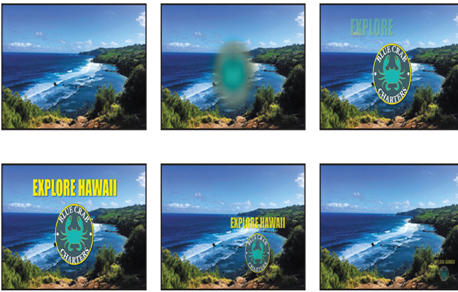
It’s time to preview all of the effects together.
- Click the Explore Hawaii tab in the Timeline panel to switch to the main composition. Press the Home key or drag the current-time indicator to make sure you’re at the beginning of the time ruler.
- Make sure the Video switch (
) is selected for both layers in the Explore Hawaii Timeline panel.
- Click the Play button (
) in the Preview panel, or press the spacebar, to watch the preview. Press the spacebar to stop playback at any time.

Adding transparency
The logo should appear semitransparently in the corner of the frame during the presentation. You’ll reduce the opacity of the logo, scale it, and shift its position so that it can be used this way.
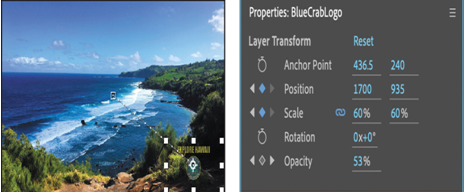
- Still in the Explore Hawaii Timeline panel, go to 2:10.
- Select the BlueCrabLogo layer in the Timeline panel.
- In the Properties panel, click the stopwatch icon (
) next to Opacity to set a keyframe at this point in time. By default, the Opacity is 100%—fully opaque.
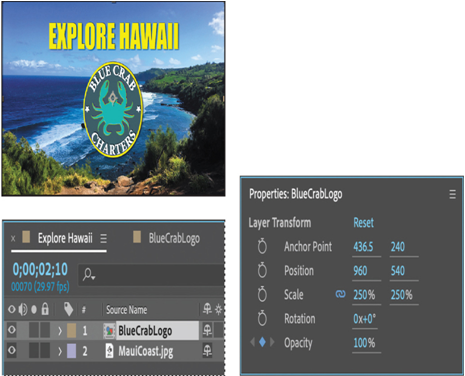
4. Press the End key or drag the current-time indicator to go to the end of the time ruler (2:29), and change the Opacity to 40%. After Effects adds a keyframe.

The logo appears, the words Explore Hawaii show up, and it all fades to 40% opacity.
5. Go to 2:10, and click the stopwatch icons () to set initial keyframes for both the Position and Scale properties.
6. Go to 2:25, and change the Scale to 60% and the Position to 1700, 935.
7. Click the Play button () in the Preview panel, press the spacebar, or press 0 on your numeric keypad to preview your composition.
8. Press the spacebar to stop playback when you’re done.
9. Choose File > Save to save your project.
More Details